RD54
From Computer History Wiki
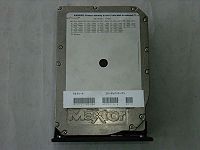
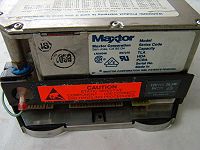
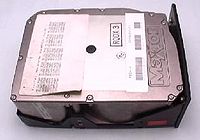
The RD54 is 159 MB 5.25" ST506 disk drive, a re-labelled Maxtor XT 2190
Data sheet
XT - 2190    MAXTOR
NO MORE PRODUCED                                      Native|  Translation
                                                      ------+-----+-----+-----
Form                 5.25"/FH              Cylinders    1224|     |     |
Capacity form/unform   155/  191 MB        Heads          15|     |     |
Seek time   / track  30.0/ 4.0 ms          Sector/track   33|     |     |
Controller           MFM / ST506           Precompensation 65535
Cache/Buffer               KB              Landing Zone
Data transfer rate    0.625 MB/S int       Bytes/Sector      256
                      0.625 MB/S ext
Recording method     MFM                            operating  | non-operating
                                                  -------------+--------------
Supply voltage     5/12 V       Temperature *C        10 45    |    -40 60
Power: sleep              W     Humidity     %         8 95    |      8 95
       standby            W     Altitude    km            3.048| -0.305 12.192
       idle               W     Shock        g         2       |     20
       seek          25.0 W     Rotation   RPM      3600
       read/write         W     Acoustic   dBA
       spin-up            W     ECC        Bit   -
                                MTBF         h      30000
                                Warranty Month
Lift/Lock/Park     YES          Certificates

Layout

MAXTOR XT-2000 PRODUCT SPECIFICATION AND OEM MANUAL 1011002 REV. F

  +---------------------------------------------------------+/ J4
  |                                                         |XX
  |                                                         |XX
  |                                                  +-+JE  |XX J2
  |                                                  +-+    |XX
  |                                                         |XX
  |                                                         |XX
  |                                                         |
  |                                 ++JD               ++   |XX
  |                                 ++                 ||J7 |XX
  |                                 ++JA               ++   |XX
  |                                       +-----+   ++JC    |XX J1
  |                                       +-----+   ++      |XX
  |                                       TERMINATOR++J8    |XX
  |                                       RESISTOR          |XX
  |                                                  JF++   |
  |                                                    ++   |XX Power
  |                                                         |XX J3
  +---------------------------------------------------------+

Jumpers

MAXTOR XT-2000 PRODUCT SPECIFICATION AND OEM MANUAL 1011002 REV. F

Jumper setting
--------------

x = Jumpers set at factory

Jumper JA/JD/JC
---------------

   x  JA/JD/JC IN

For factory use only

JE Spindle power control
-------------------------
NOTE
This is only available on PCB Part #1059085

   x  JE       IN

The spindle motor can be controlled via J2 pin 5 on the interface of
the XT2000 series drive. A low level on this pin will keep the
spindle from powering up when system power is applied. This feature
is used to allow power sequencing on multi-drive systems. Installing
Jumper JE enables this option.

 JF  Head Select
 ---------------
   x  JF       IN

Note: This option is only available on PCB Part #1059085

This feature applies only to drives with 8 heads.
On these drives some systems use J1 pin 2 for something other than
head select. In this case the head select jumper (JF) must be re-
moved.

 J3/P3  Power
 ------------
              +---------+
              | 4 3 2 1 |
              +-+-+-+-+-+
                | | | +-------------  +12 Volts DC   5% *
                | | +---------------  +12 Volt Return
                | +-----------------  + 5 Volt Return
                +-------------------  + 5 Volts DC   5%

          * = 10% at power on or seeking

The DC power connector (J3), is a 4 pin AMP MATE-N-LOOK connector
P/N 350543-1 mounted on the solder side of the PCB. The recommended
mating connector (P3) is AMP P/N 1-480424-0 utilizing AMP pins P/N
350078-4 (strip) or P/N 61173-4 (loose piece).

 J7  Drive Select
 ----------------
   x  J7  I-C  IN

In multiple drive configurations, it is necessary to configure each
drive (max. of 4 per host controller) with a unique address. This is
accomplished by locating the jumper plug over the correct pins. The
standard drive is shipped as Drive 1.

Note: Some boards have pins marked: 123456. The boards are electric-
ally equivalent; only these labels are different.

   +--------------+----------------+---------------+
   |Board Label   |    4C32C1      |     123456    |
   +--------------+----------------+---------------+
   |Drive Select  |    Pin No.     |     Pin. No.  |
   +--------------+----------------+---------------+
   |    0         |      1.C       |        5,6    |
   +--------------+----------------+---------------+
   |    1         |      2.C       |        4,5    |
   +--------------+----------------+---------------+
   |    2         |      3.C       |        2,3    |
   +--------------+----------------+---------------+
   |    3         |      4.C       |        1,2    |
   +--------------+----------------+---------------+

Drive selection occurs when one of the DRIVE SELECT lines is activ-
ated from the controller. Only the selected drive will respond to the
signals, and only that drive's output signals are then gated to the
controller.

DRIVE SELCT, when low, connects the drive interface to the control
lines. Positioning the DRIVE SELECT jumper betwen the two appropriate
pins on the drive printed circuit board determines which drive will
be selected.

 J8  Write Protect
 -----------------
   x  J8       OUT

A write protect option has been incorporated into the XT2000
series drive. This option is invoked by attaching a shorting plug or
a switch across J8 pins 1 and 2 on the PCB. These pins are on .100"
centers for ease of installing a switch connector. If a shorting plug
is installed between J8 pins 2 and 3, the drive may be write protec-
ted by a signal on interface line J2-3 (Remote Write Protect).

Install

MAXTOR XT-2000 PRODUCT SPECIFICATION AND OEM MANUAL 1011002 REV. F

Notes on installation
=====================

Installation direction
----------------------

     horizontally                           vertically
   +-----------------+             +--+                       +--+
   |                 |             |  +-----+           +-----+  |
   |                 |             |  |     |           |     |  |
 +-+-----------------+-+           |  |     |           |     |  |
 +---------------------+           |  |     |           |     |  |
                                   |  |     |           |     |  |
                                   |  |     |           |     |  |
 +---------------------+           |  +-----+           +-----+  |
 +-+-----------------+-+           +--+                       +--+
   |                 |
   |                 |
   +-----------------+

The drive will operate in all axis (6 directions).

Mounting Orientation
--------------------
The XT2000 may be mounted in any orientation.

In any final mounting configuration, insure that the operation of the
three shock mounts which isolate the base casting from the frame is
not restricted.

Mounting Holes
--------------
Eight mounting holes, four on the bottom and two on each side are
provided for mounting the drive into an enclosure. The size and loca-
tion of these holes, are identical to industry standard floppy
drives.

Caution: The casting is very close to the frame mounting holes in
some locations. Mounting screw lengths must be chosen such that no
more than .125" of the screw is available to enter the frame mounting
hole. The torque applied to the mounting screws should be at least 9
inch-pounds but to avoid stripping the threads, the maximum torque
applied shall not exceed 12 inch-pounds.

J1/P1 Connector
---------------
Connection to J1 is via a 34 pin PCB edge connector. The pins are
numbered 1 through 34 with the even pins located on the component
side of the PCB. Pin 2 is located on the end of the PCB connector
closest to the DC power connector J3/P3. A key slot is provided be-
tween pins 4 and 6. The recommended mating connector for P1 is AMP
ribbon connector P/N 88373-3.

J2/P2 Connector
---------------
Connection of J2 is via a 20 pin PCB edge connector. The pins are
numbered 1 through 20 with the even pins located on the component
side of the PCB. The recommended mating connector for P2 is AMP
ribbon connector P/N 88373-6. A key slot is between pins 4 and 6.

J3/P3 Power Connector
---------------------
The DC power connector (J3), is a 4 pin AMP MATE-N-LOCK connector
P/N 350543-1 mounted on the solder side of the PCB. The recommended
mating connector (P3) is AMP P/N 1-480424-0 utilizing AMP pins P/N
350078-4 (strip) or P/N 61173-4 (loose piece).

J4/P4 Frame Ground Connector
-----------------------------
The frame ground connection is a Faston type connection, AMP P/N
61761-2. The recommended mating connector is AMP 62187-1. If wire is
used, the hole in J4 will accommodate a wire size of 18AWG maximum.

Removable Faceplate
-------------------
Note: Available as of 1/87.

The faceplate may be removed in installations that require it. Remove
the two C clips and unplug the LED cable from PCB.

Cooling Requirements
--------------------
To insure reliable operation, it is recommended that airflow of at
least 3 CFM be provided across the disk drive and printed circuit
board assembly in the final installation configuration.

Electrical Interface
--------------------
The interface to the XT2000 can be divided into three categories,
each which is physically separated.

   1. Control signals
   2. Data signals
   3. DC power

All control lines are digital in nature (open collector TTL) and
either provide signals to the drive (input) or signals to the host
(output) via interface connection J1/P1. The data transfer signals
are differential in nature and provide data either to (write) or from
(read) the drive via J2/P2 (defined by EIA RS-422).

The XT2000 is designed with connector pin assignment and inter-
connection of cabling between the host controller and drives.

 Cable Connection
 ----------------
      HOST
 +---------------+                 +---------------+
 |               +---CONTROL-------XJ1             |
 |               |               +-X               |
 |               |    +-DATA-----+-+J2     Drive #1|
 |               |    |   +------+-+J3  J4         |
 |               |    |   |      | +-----+---------+
 |               |    |   |    +-+-------+
 |               |    |   |    | | +---------------+
 |               |    |   |    | +-XJ1             |
 |               |    |   |    | +-X               |
 |               |    | +-+DATA+-+-+J2     Drive #2|
 | Controller    |    | | o----+-+-+J3  J4         |
 |               |    | | |    | | +----+----------+
 |               |    | | |    o-+------+
 |               |    | | |    | | +-------------+-+ Terminator
 |               |    | | |    | +-XJ1           +-+ (Last Drive only)
 |               |    | | |    |   X               |
 |             1 +----+ |++----+---+J2     Drive #N|
 |             2 +------+|o----+---+J3  J4         |
 |             N +-DATA--+|    |   +-----+---------+
 |               |        |    o---------+
 +---------------+        |    |
                          |    |
     DC VOLTAGES  --------+    |
     (Radial)                  |
     FRAME GROUND -------------+

Features

MAXTOR XT-2000 PRODUCT SPECIFICATION AND OEM MANUAL 1011002 REV. F

Key Features
------------
The XT2000 disk drives are low cost, high capacity, high performance
random access storage devices utilizing nonremovable 5 -inch disks as
storage media. Each disk surface employs one movable head to access
up to 1224 data tracks.

Low cost and high perrformance are achieved through the use of a
rotary voice coil actuator and a closed loop servo system utilizing a
dedicated servo surface. The innovative rotary voice coil actuator
provides an average access time of better than 26 msec and a track-
to-track access time of less than 4 msec; performance usually
achieved only with larger sized, higher powered linear actuators. The
closed loop servo system and dedicated servo surface combine to allow
state-of-the-art recording densites (1070 tpi, up to 11,155 bpi) in a
5 -inch package.

High capacity is achieved by a balanced combination of high aerial
density packaging techniques. Maxtor's advanced MAXPAK(TM) electronic
packaging techniques utilize miniature surface mount devices to
allow all electronic circuitry to fit on one printed circuit board.
Advanced 3380 Whitney type head flexures and sliders allow closer
spacing of disks and therefore allow a higher number of disks in a 5
-inch package. The unique integrated drive motor/spindle design
allows a deeper deck casting than conventional designs, thus
permitting more disk to be used.

The XT2000 electrical interface is compatible with the industry
standard ST506/412 family of 5 -inch fixed disk drives. The
XT2000 size and mounting are also identical to the industry
standard 5 -inch floppy and Winchester disk drives, and they use the
same DC voltages and connectors. No AC power is required.

Media Defects
-------------
Defects on the media surface will be identified on a defect map
provided with each drive. This defect map will indicate the head
number, track number, and number of MFM bytes from index for each
defect.

The maximum allowable number of defects per drive shall not exceed
an average of thirteen (13) per disk surface. Cylinder 0 is certified
to be defect-free.

The maximum number of defects per drive is listed below:

  Model    Disks  Data      Max. No. of
                  Surfaces  Defects
  XT-2085    4       7       91
  XT-2140    6      11      143
  XT-2190    8      15      195

In addition, the following limit will also be met:

    The maximum number of defects per surface shall not exceed thirty-
    two (32).

 Warning:  The defect map attached to the cover of each drive
           should be removed before operating.

Defect Map Format (for maps written on drives)
----------------------------------------------
The format Maxtor uses for the defect maps written on the drive is
as follows:

   The defect map is written on the drive using Adaptec controller
   format.

   The defect map is written on all sectors of cylinder 0, maximum
   cylinder -8, maximum cylinder and maximum cylinder +1.

Control Input lines
-------------------
The input lines have the following electrical specifications. The
control signal-driver/receiver combination is the recommended
circuit.

   TRUE:  0.0 VDC to 0.4  VDC @ 1 = -48 mA (Max)
   FALSE: 2.5 VDC to 5.25 VDC @ 0 = +250 uA (Open Collector)

Control Output Lines
--------------------
The output control signals are driven with an open collector output
stage capable of sinking a maximum of 48mA at low level or true state
with maximum voltage of 0.4V measured at the driver. When the line
driver is in high level or false state, the driver transistor is off
and collector leakage current is a maximum of 250uA.

All J1 output lines are enabled by their respective DRIVE SELECT
line.

The control signal-driver/receiver combination is the recommended
circuit.

A 220/330 resistor pack allows for line termination.

Read/Write and Control Electronics
----------------------------------
Drive Electronics are packaged on a single printed circuit board.
This board, which includes two microprocessors, performs the follow-
ing functions:

      Reading/writing of data
      Index detection
      Head positioning
      Head selection
      Drive selection
      Fault detection
      Voice coil actuator drive circuitry
      Track 0 detection
      Recalibration to track 0 on power-up
      Track position counter
      Power and speed control for spindle drive motor
      Drive up-to-speed indication circuit
      Reduced write current on the inner tracks
      Monitoring for write fault conditions
      Control of all internal timing
      Generation of seek complete signals

Drive Mechanism
---------------
A brushless DC direct drive motor contained within the spindle hub
rotates the spindle at 3600 rpm. The spindle is driven with no belt
or pulleys beeing used. The motor and spindle are dynamically
balanced to insure a low vibration level. Dynamic braking is used to
quickly stop the spindle motor when power is removed. The head/disk
assembly is shock mounted to minimize transmission of vibration
through the chassis or frame.

Air Filtration System
---------------------
The XT2000 has an air filtration system. The disks and read/
write heads are assembled in an ultra clean-air environment and then
sealed within the module. The module contains an internal absolute
filter mounted inside the casting to provide constant internal air
filtration. A second filter, located on the enclosure top cover,
permits pressure equalization between internal air and ambient air.

Positioning Mechanism
---------------------
The read/write heads are mounted on a head arm assembly which is then
mounted to a ball-bearing supported shaft. The voice coil, an
integral part of the head/arm assembly, lies inside the magnet
housing when installed in the drive. Current from the power
amplifier, controlled by the servo system, causes a magnetic field
in the voice coil which either aids or opposes the field around the
permanent magnets. This reaction causes the voice coil to move within
the magnetic field. Since the head-arm assemblies are mounted to the
voice coil, the voice coil movement is translated through the pivot
point directly to the heads and achieves positioning over the desired
cylinder.

Actuator movement is controlled by the servo feed-back signal from
the servo head. The servo head is located on the lower surface of the
bottom disk, where servo information is pre-written at the factory.
This servo information is used as a control signal for the actuator
to provide track-crossing signals during a seek operation, track-
following signals during ON CYLINDER operation, and timing informa-
tion such as index and servo clock.

Read/Write Heads and Disks
--------------------------
The XT2000 employs composite manganese-zinc ferrite 3380 "Whitney"
type head sliders and flexures.

Reliability and Maintenance
---------------------------
MTBF 30,000 POH, typical usage
MTTR 30 minutes
Component Design Life 5 years
External links
- rd54 - documentation at Bitsavers
- RD54-D, -R Fixed Disk Drive Subsystem Owner's Manual (EK-LEP07-OM-001)
- Disk Storage Solutions for Desktop and Deskside Environments - covers the RD54


